MQTT LED Controller: A Python Web GUI for Your IoT Devices
While command-line tools are great for testing, a graphical interface provides a much more intuitive way to control custom IoT projects. To that end, I developed the MQTT LED Controller GUI, a web-based application built with Python for managing MQTT-enabled LED strips like my ESP32 LED strip client.
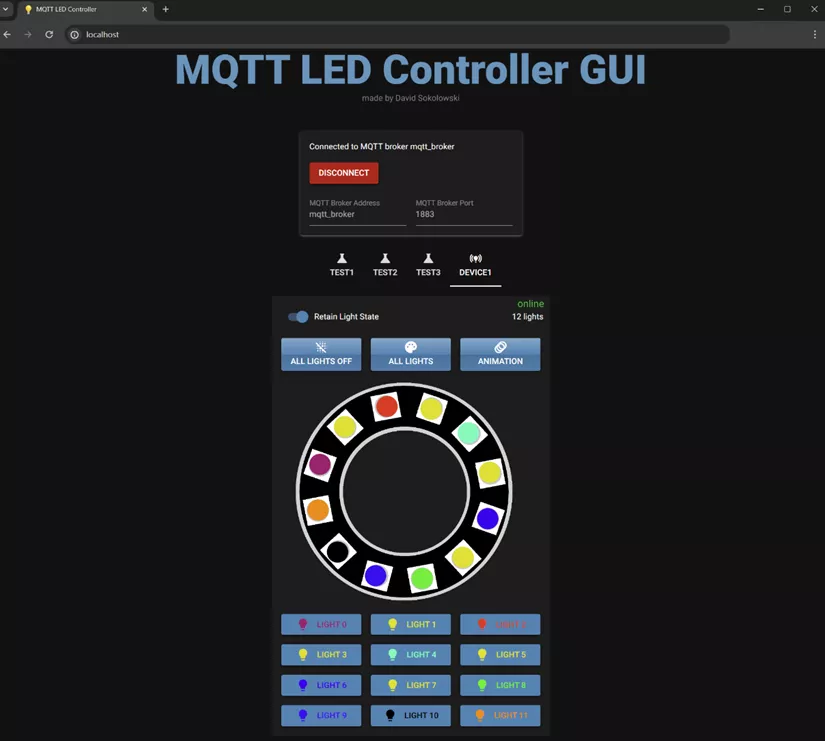
This project provides a clean, user-friendly control panel that can be accessed from any web browser on your network.
Architecture and Key Features
Unlike a purely client-side application, this GUI is powered by a Python backend using the excellent NiceGui library to serve the web interface . It uses the Paho MQTT client to handle broker communication. This server-side architecture allows for robust state management and seamless real-time updates.
Key features include:
- Intuitive Controls: Easily toggle the LED state (On/Off) and select any color using a visual color picker.
- Real-Time State Sync: The UI subscribes to MQTT state topics and updates automatically, ensuring it always reflects the true status of your connected devices.
- Dynamic Device List: The application automatically discovers and lists connected LED controllers, allowing you to select and manage multiple devices from one interface.
- Containerized Deployment: The entire application, including a Mosquitto MQTT broker, can be deployed instantly using Docker Compose, making setup incredibly simple.
Getting Started: Two Ways to Deploy
The project is designed to be flexible, offering two clear paths for installation.
Option 1: Using Docker (Recommended)
This is the easiest method to get up and running. It bundles the GUI and a pre-configured MQTT broker into Docker containers.
- Clone the repository and navigate into the directory.
- Run Docker Compose:
1
docker compose up
- Open your browser and navigate to
http://localhost:8080.
Option 2: Local Python Environment
If you prefer to run the application directly or use an existing MQTT broker, you can set it up in a local Python environment.
- Make sure you have Python (>= 3.10) installed.
- Clone the repository.
- Install the required Python packages:
1
pip install -r requirements.txt
- Run the main application script:
1
python mqtt_led_controller_ui/main.py
- Access the UI at
http://localhost:8080.
Configuration
The application’s behavior can be customized by editing the settings.py file. Here, you can define your MQTT broker’s URL, connection credentials, and the specific topics used for state and control messages.
View the Project on GitHub
This project provides a powerful yet simple control panel for any MQTT-based LED project. For complete source code, detailed setup instructions, and configuration options, please visit the official GitHub repository.